How To
-
1
Create Profile
New Content Types are created using the Content menu in your toolbar. To create a new Profile, navigate to Content > Add Content > Profile.
-
2
Name
Begin filling out the form. Fields marked with an asterisk (*) are required:
- Full Name (*) - Enter the page name here. It appears in the browser's address bar and forms the URL so it should be brief. The optimal title length is less than 60 characters, including spaces. This appears on the Profile and in its URL. Example: Teena Piccione
- Job Title - Enter the individual's job title. Example: Secretary & State Chief Information Officer
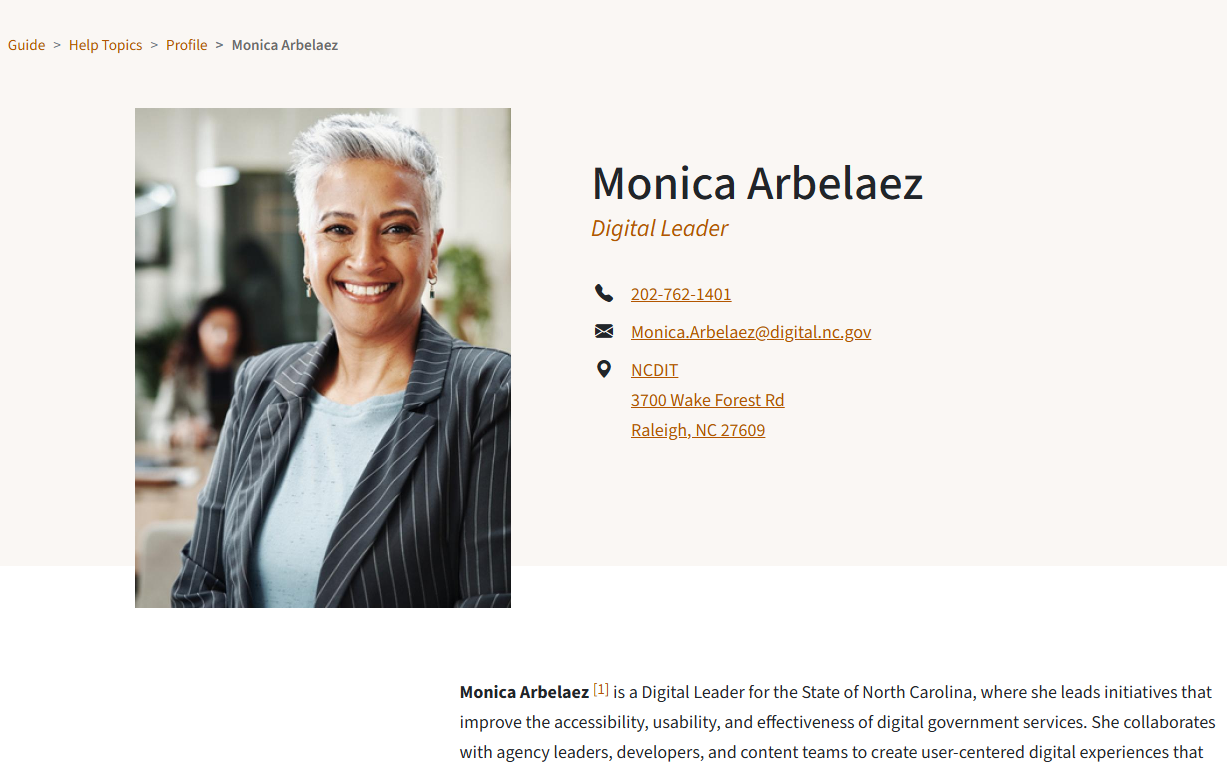
The Full Name and Job Title appear to the right of the Profile Image.
- Full Name (*) - Enter the page name here. It appears in the browser's address bar and forms the URL so it should be brief. The optimal title length is less than 60 characters, including spaces. This appears on the Profile and in its URL. Example: Teena Piccione
-
3
Photo
Dimensions and Resolution
The ideal dimensions for a portrait Profile Photo are 752px wide x 1000px high. The recommended minimum resolution is double the desktop view size for clearer, better-looking images on high resolution screens. Download an image to use as a template.
Alternative Text
All meaningful images must have descriptive alternative text (alt text) to be accessible for visitors with low or no vision. If the image does not convey meaningful information and is purely decorative, check the box for Decorative Image and leave the Alternative Text field empty. This allows screen reading software to skip over the image. Learn more about Alternative Text.
- Photo - Select the Add Media button to add a portrait of the individual.
- The Media Library opens. Select the desired image, or upload a new image and select it.
- Select Insert Selected.
- A thumbnail of the image you selected now appears.
- Image files must be 256 MB or less.
- Allowed image file types include .png, .gif, .jpg, and .jpeg.
-
4
Summary and Biography
- Summary - Briefly describe the contents of the Profile page. The Summary appears in search engine results with the link. Provide a Summary to enhance Search Engine Optimization (SEO). Note: When left blank, the Summary field uses an excerpt from the Biography as the summary.
- Biography - Enter the individual's full biography in the Text Editor.
- Summary - Briefly describe the contents of the Profile page. The Summary appears in search engine results with the link. Provide a Summary to enhance Search Engine Optimization (SEO). Note: When left blank, the Summary field uses an excerpt from the Biography as the summary.
-
5
Contact Information
- Phone Number - Enter the individual's phone number.
- Email Address - Enter the individual's email address.
-
6
Address
If you do not need to provide an Address, proceed to Save the page.
If you do need to to provide an Address, expand the Address section:
- Country - Select United States from the Country menu. New fields are now required. Provide the full address to generate Google Maps directions to the location:
- Location Name - Enter a name for the location.
- Street Address (*) - Enter a street address.
- City (*) - Enter the City name.
- State (*) - Select a State from the menu.
- Zip Code (*) - Enter a Zip Code.
- Location Name - Enter a Location Name, if desired.
- Street Address - Enter a physical address for the Profile subject.
- City - Enter the City name.
- State - Choose a State from the dropdown menu.
- Zip Code - Enter the Zip Code.
The Contact Information and Address appear to the right of the Profile Image.
- Country - Select United States from the Country menu. New fields are now required. Provide the full address to generate Google Maps directions to the location:
-
7
Save
Save often as you work on your content to avoid losing work due to timing out or navigating away from the page.
Current State: Displays the current status of the Content Type and whether or not it is available to the public.
Change to: The state you want the content to be in the next time you select the Save button.
- Draft - All new content types are in Draft State by default. This state allows you to continually edit and save your work before it is made available to the public.
- Needs Review - Editors may save as Needs Review when they are finished working and want a Publisher or Web Manager to publish the content.
- Published - This content is available to the public. Only a Publisher or Web Manager can choose this state.
- Unpublished - This content was available to the public at one time, but is not now. Only a Publisher or Web Manager can choose this state.
Delete: Deleted Content Types cannot be recovered. If you may need this content again in the future, it is best to change the state to Unpublished.