
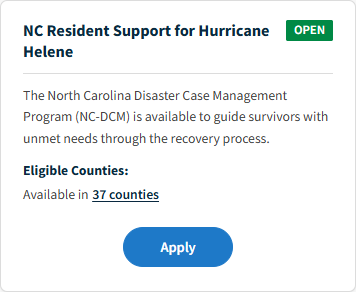
How to Create a Disaster Support Program
-
1
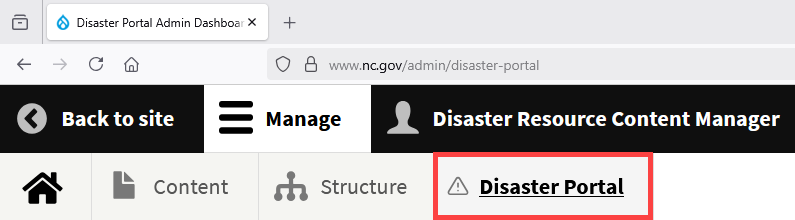
Login and Navigate to the Disaster Portal Admin Dashboard
- Login to the portal
- Navigate to
/admin/disaster-portal
-
2
Create Disaster Support Program
In the Disaster Recovery Content table, go to the Create column and select the link to Create Disaster Support Program.
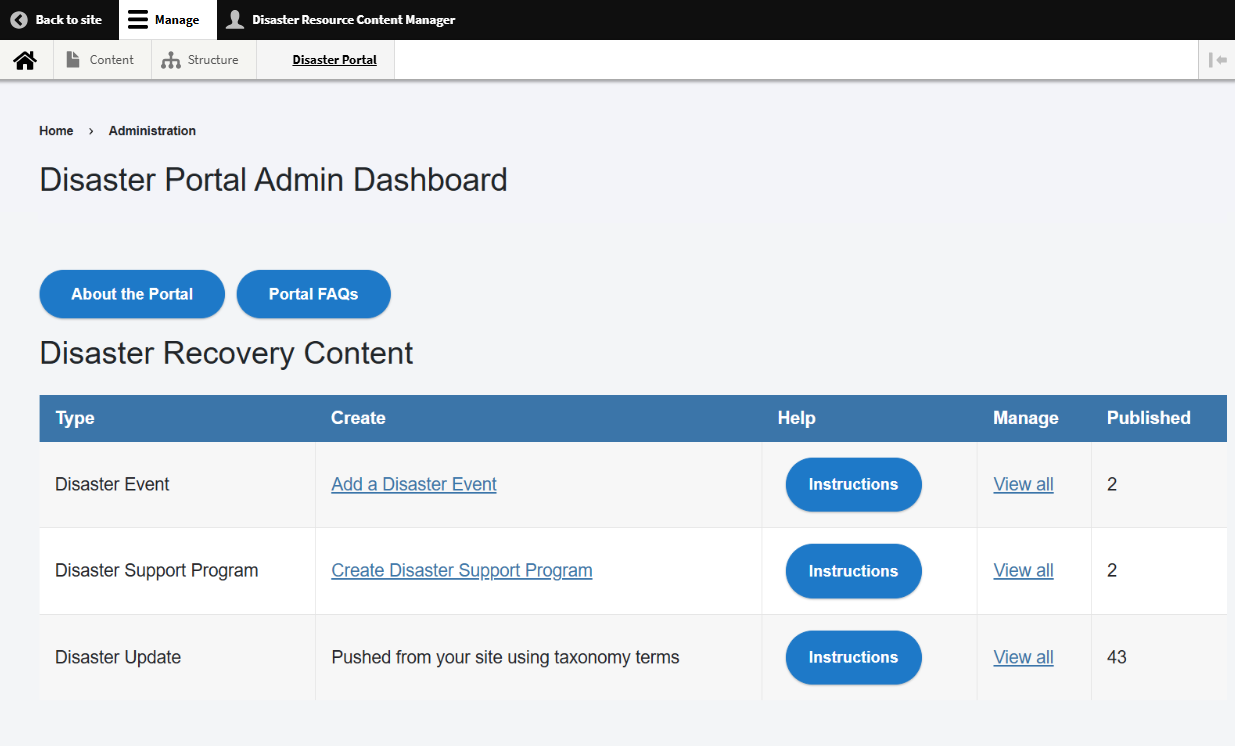
Note: This tutorial opens in a new window if you select the Instructions button. -
3
Complete Form Fields
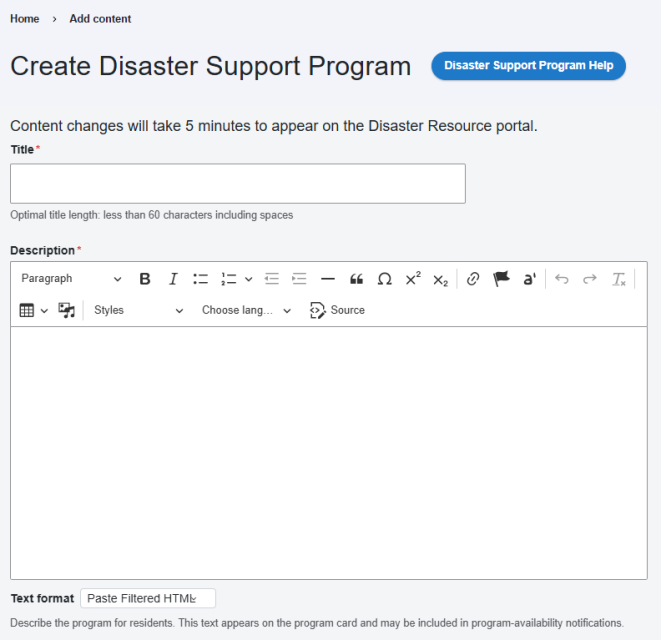
Begin filling out the form. Fields marked with an asterisk (*) are required.
- Title* - Enter the name of the program in the Title field. This appears on the page for the program, its URL, and on the Portal.
- Description* - Provide a detailed description of the program and its services. This text appears on the program card and may be included in program-availability notifications.
-
4
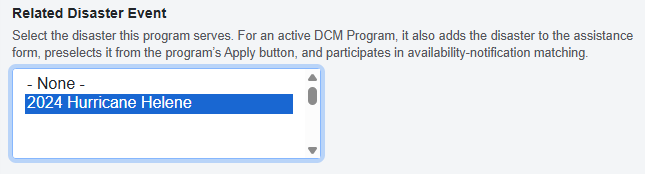
Related Disaster Event
Select the disaster this program serves. Example: 2024 Hurricane Helene
Note: If the disaster is not available in the drop-down menu, you may need to add a Disaster Event. This only needs to be done once per disaster.
For an active DCM Program, it also adds the disaster to the assistance form, preselects it from the program’s Apply button, and participates in availability-notification matching.
-
5
Select the Program Type*
Select DCM Program only when Apply should use the portal assistance request for the Related Disaster. Other program types use the Program Application URL when available. Program Type also controls which active programs can add disasters to the assistance form.
-
6
Sponsoring Agency*
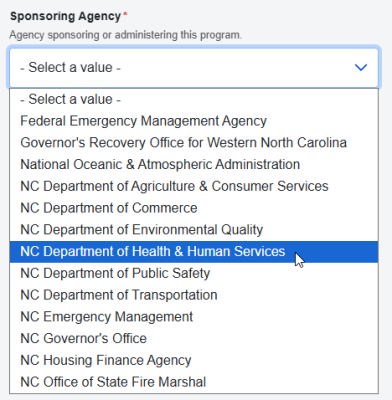
Example: NC Department of Health & Human Services Select the State or Federal agency sponsoring or administering this program.
- Federal Emergency Management Agency
- Governor's Recovery Office for Western North Carolina
- National Oceanic & Atmospheric Administration
- NC Department of Agriculture & Consumer Services
- NC Department of Commerce
- NC Department of Environmental Quality
- NC Department of Health & Human Services
- NC Department of Public Safety
- NC Department of Transportation
- NC Emergency Management
- NC Governor's Office
- NC Housing Finance Agency
- NC Office of State Fire Marshal
-
7
Related Unmet Needs*
Select every need this program addresses. Availability notifications match these terms to needs reported in opted-in assistance requests; a program with no matching terms is not sent. Use the established terms without renaming them.
- Crisis counseling/behavioral health/emotional care
- Emergency shelter
- Employment
- Essential clothing
- Essential furniture/appliances
- FEMA assistance applicant or appeal
- Financial assistance
- Food and water
- Functional needs (services, devices, accessibility support)
- Health insurance or healthcare access
- Home repairs/rebuild
- Housing Assistance
- Legal assistance
- Medical care/injury treatment
- Mold remediation
- Pet care/accommodation
- Property access (roads, bridges, etc.)
- Temporary storage of belongings
- Transportation
- Utilities assistance
-
8
Eligibility
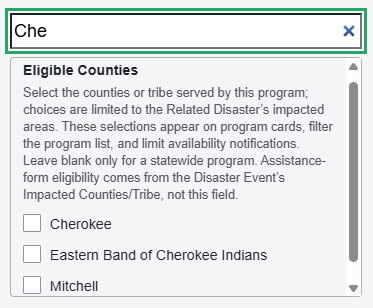
Example: Searching for "che" narrows the list to Cherokee county, the Eastern Band of Cherokee Indians tribe, and Mitchell county. Eligible Counties
Check one or more boxes for the counties eligible for this Support Program. You can also search counties by name. The Eastern Band of Cherokee Indians tribe is also listed here.
Note: The options found here are limited to the counties associated with the Disaster Event you selected in the Related Disaster Event drop-down field.
If you need to add or remove counties, you must edit the existing Disaster Event taxonomy term:
- Navigate to the Disaster Portal Admin Dashboard at
/admin/disaster-portal. - In the Disaster Event row, select View all under the Manage column.
- Find the desired Disaster Event and add or remove counties as needed.
Eligibility Criteria
Describe in detail who qualifies for this program.
Program Application URL
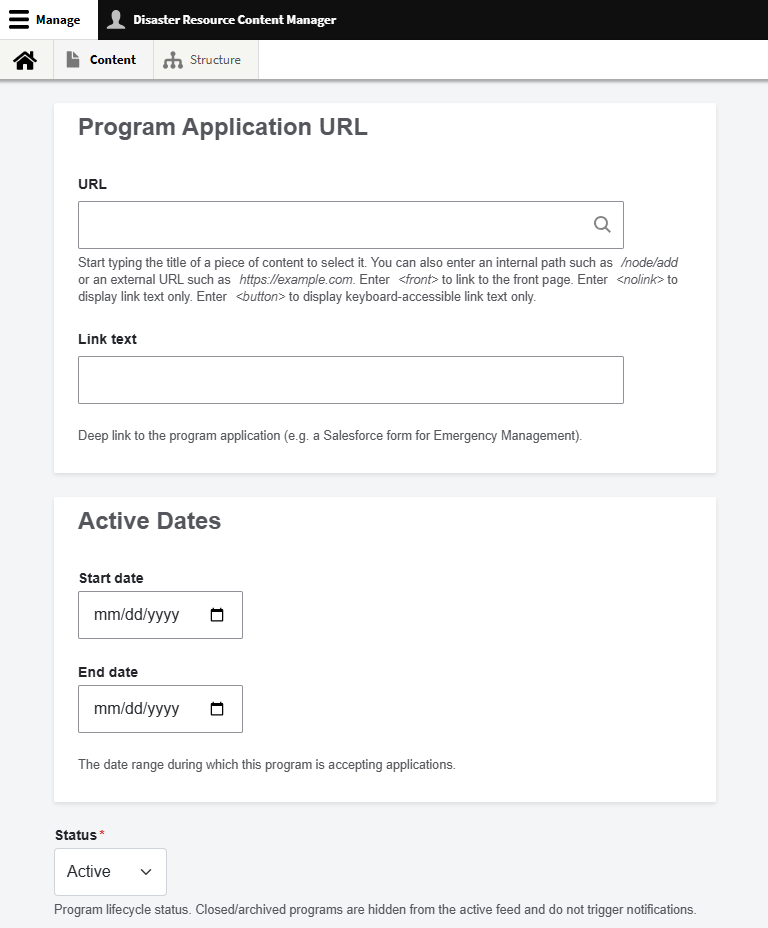
- URL * - Enter the destination for an active non-DCM program action. The URL may also appear in availability notifications. Active DCM programs with a Related Disaster use the portal assistance form for Apply.
- Link text - Link text containing "Details" or "Learn more" creates a details action instead of Apply.
Active Dates
Dates displayed on the program card. For an active program, the end date appears as the application deadline; for a closed program, it appears as the closed date. These dates do not open or close the program; use Status to control availability.
- Start date - Key or select the date the program started.
- End date - Key or select the date the program ends.
Status*
Controls where the program appears and whether residents can apply. Active programs appear in the Open view and may provide an Apply action or availability notifications. Closed and Archived programs have no Apply action and appear in the Closed view. Publishing is controlled separately.
- Active - Indicates that this program is currently in effect. Active programs display on the programs feed and trigger notifications to constituents who have created an account.
- Closed - Indicates that this program has ended. Closed programs do not display on the programs feed or trigger notifications to constituents who have created an account.
- Archived - Indicates that this program has ended and is archived. Archived programs do not display on the programs feed or trigger notifications to constituents who have created an account.
- Navigate to the Disaster Portal Admin Dashboard at
-
9
Saving and Publishing
Current State
Describes whether or not this content type is visible to the public. Content is saved in the Draft state by default.
Note: This workflow is different from what you may be used to on Digital Commons. All Disaster Recovery content must be saved as Needs Review before the Published option becomes available.
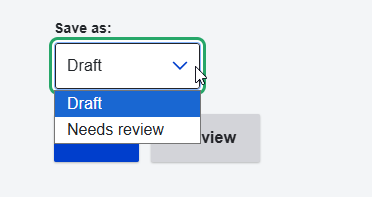
Change to:
- Draft - This content type is a work in progress and not visible to the public.
- Needs Review - This content type is ready to be approved so that it can be made visible to the public.
- Published - This content type is visible to the public.
- Unpublished - This content type was visible to the public, but has been taken down. Content must be saved as Published for the Unpublished option become available.
Security Delay
Expect a delay of about 5 minutes before confirming that content is visible in the public Portal. This delay is intentional for security.
This page was last modified on 08/28/2026