
How to Create a Disaster Resource
-
1
Login and Navigate to the Disaster Portal Admin Dashboard
- Login to the portal
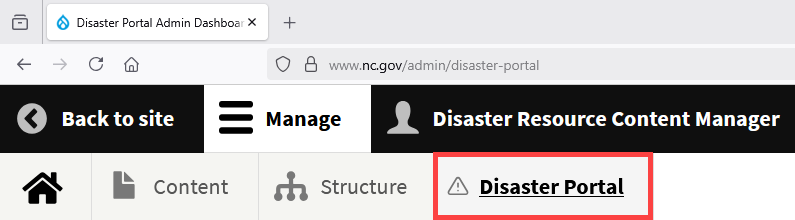
- Navigate to
/admin/disaster-portal
-
2
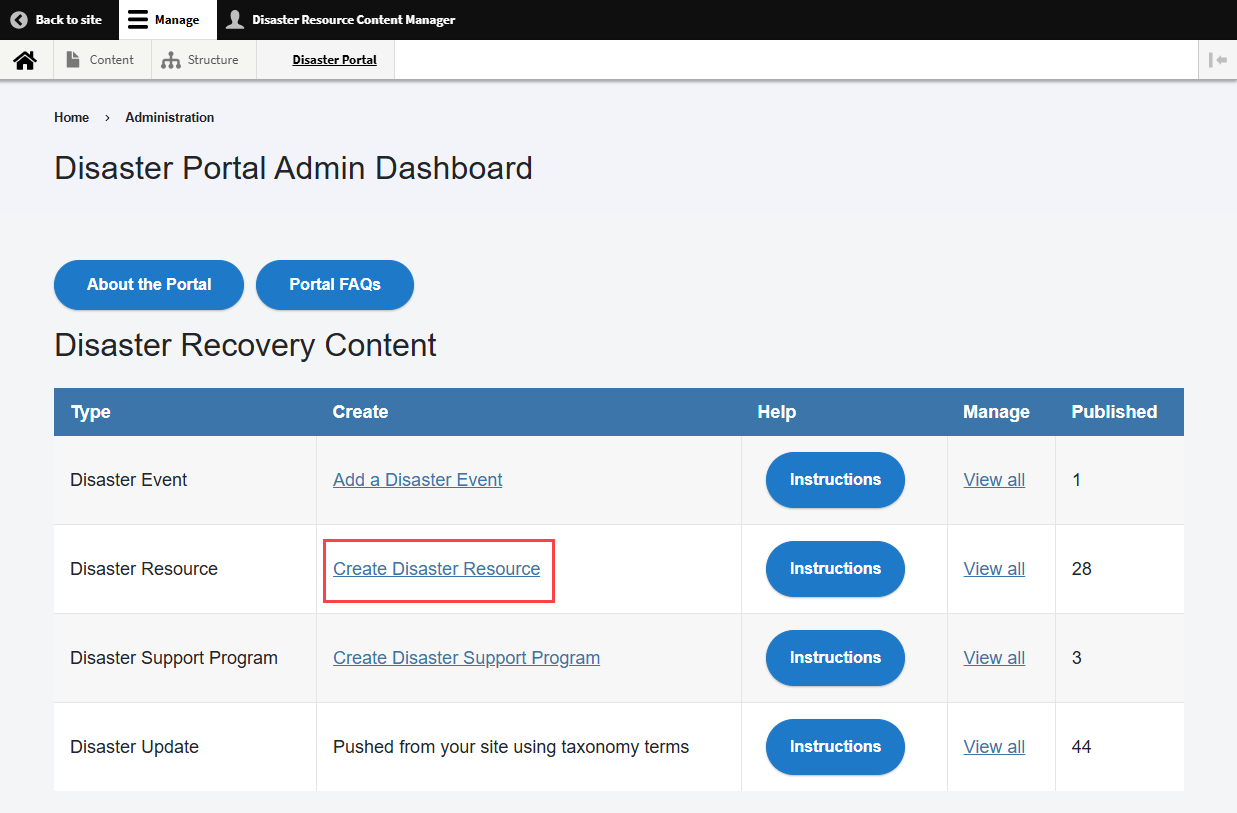
Select Create Disaster Resource
In the Disaster Recovery Content table, go to the Create column and select the link to Create Disaster Resource.
Note: This tutorial opens in a new window if you select the Instructions button. -
3
Complete Form Fields
All fields with a red asterisk (*) are required.
- Title* - Enter the name of the resource in the Title field. This appears on the page for the resource, its URL, and on the Portal.
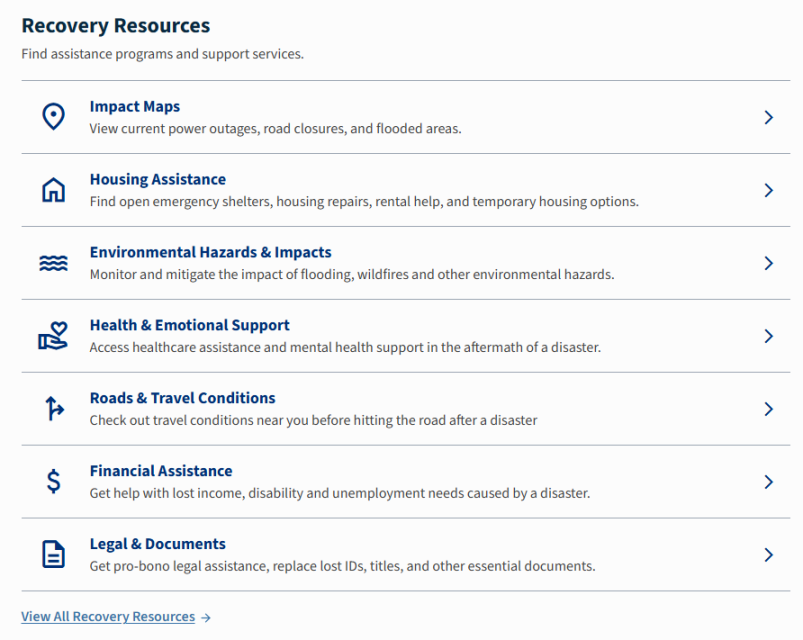
- Resource Type* - Select the categories used to group and filter this resource in the Recovery Resources directory. Your Disaster Resource will use the default icon for this Resource Type unless you choose to override it by selecting a different icon.
- Impact Maps (Default Icon: Location)
- Housing Assistance (Default Icon: Home)
- Environmental Hazards & Impacts (Default Icon: Water)
- Health & Emotional Support (Default Icon: Volunteer)
- Roads & Travel Conditions (Default Icon: Fork Right)
- Financial Assistance (Default Icon: Money)
- Legal & Documents (Default Icon: Document)
- Resource Description* - Long-form description shown to the public.
-
4
Select an Icon for the Resource Type
- Icon - If desired, select an icon appropriate for the Resource Type. If you do not select an icon, the default icon for the Resource Type will be used.
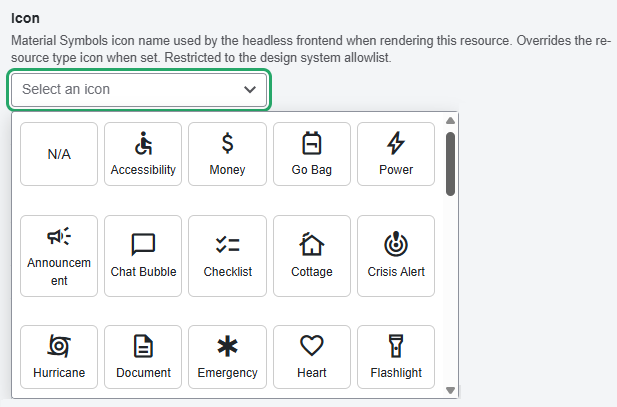 AccordionTab/Accordion Items
- N/A
- Accessibility
- Announcement
- Chat Bubble
- Checklist
- Cottage
- Crisis Alert
- Dining
- Document (Default icon for Legal & Documents)
- Drinking Water
- Emergency
- Fire Department
- Flashlight
- Flood
- Food
- Fork Right (Default icon for Roads & Travel Conditions)
- Fuel
- Go Bag
- Health & Safety
- Heart
- Help Line
- Home (Default icon for Housing Assistance)
- Hospital
- Hurricane
- Location (Default icon for Impact Maps)
- Medical Info
- Medical Services
- Medication
- Money (Default icon for Financial Assistance)
- News
- Notifications
- Package
- Person Raised Hand
- Pets
- Police
- Power
- Public Info
- Report
- Route
- Shelter
- SOS
- Thunderstorm
- Tornado
- Translate
- Volunteer (Default icon for Health & Emotional Support)
- Warning
- Water (Default icon for Environmental Hazards & Impacts)
- Work
-
5
Select Agency, Affected Counties, and Channel Target
- Agency* - Agency providing the resource. Start typing the agency to select it from the curated list (state, federal, county, NGO):
- Federal Emergency Management Agency
- Governor's Recovery Office for Western North Carolina
- National Oceanic & Atmospheric Administration
- NC Department of Agriculture & Consumer Services
- NC Department of Commerce
- NC Department of Environmental Quality
- NC Department of Health & Human Services
- NC Department of Public Safety
- NC Department of Transportation
- NC Emergency Management
- NC Governor's Office
- NC Housing Finance Agency
- NC Office of State Fire Marshal
- Affected Counties/Tribe - Select the counties or tribe this resource serves. Directory county filters use these selections. Leave blank when the resource applies everywhere.
Note: Eastern Band of Cherokee Indians is listed here. - External Resource URL - Provide the website URL of an external website users can visit. If left blank, the resource links to its internal portal page. Use a complete trusted URL. This must be an external URL such as
https://example.com. - Channel Target* - Select the channel(s) that should show this resource. Pick one or more of:
- All channels. "All channels" is a sentinel that publishes on every existing and future channel - pick it deliberately when the resource is universally relevant; otherwise pick each channel explicitly.
- Disaster Portal
- NC.gov
- Agency* - Agency providing the resource. Start typing the agency to select it from the curated list (state, federal, county, NGO):
-
6
Related Disaster Event
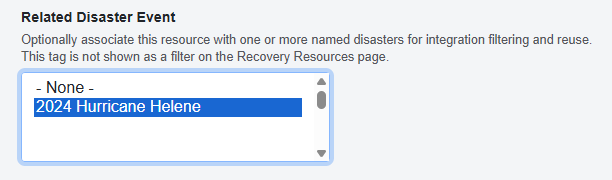
- Related Disaster Event - If desired, associate this resource with one or more named disasters for integration filtering and reuse. This tag is not shown as a filter on the Recovery Resources page. Example: Hurricane Helene 2024.
- Last Verified - Select or enter the date the resource was last reviewed for accuracy.
Note: If the disaster is not available in the drop-down menu, you may need to add a Disaster Event. This only needs to be done once per disaster.
-
7
Saving and Publishing
Current State
Describes whether or not this content type is visible to the public. Content is saved in the Draft state by default.
Note: This workflow is different from what you may be used to on Digital Commons. All Disaster Recovery content must be saved as Needs Review before the Published option becomes available.
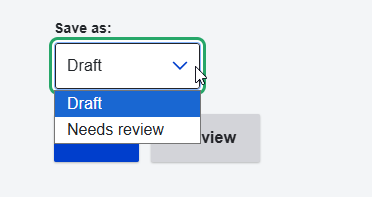
Change to:
- Draft - This content type is a work in progress and not visible to the public.
- Needs Review - This content type is ready to be approved so that it can be made visible to the public.
- Published - This content type is visible to the public.
- Unpublished - This content type was visible to the public, but has been taken down. Content must be saved as Published for the Unpublished option become available.
Security Delay
Expect a delay of about 5 minutes before confirming that content is visible in the public Portal. This delay is intentional for security.
This page was last modified on 07/27/2026