How to Add Terms and Definitions
-
1
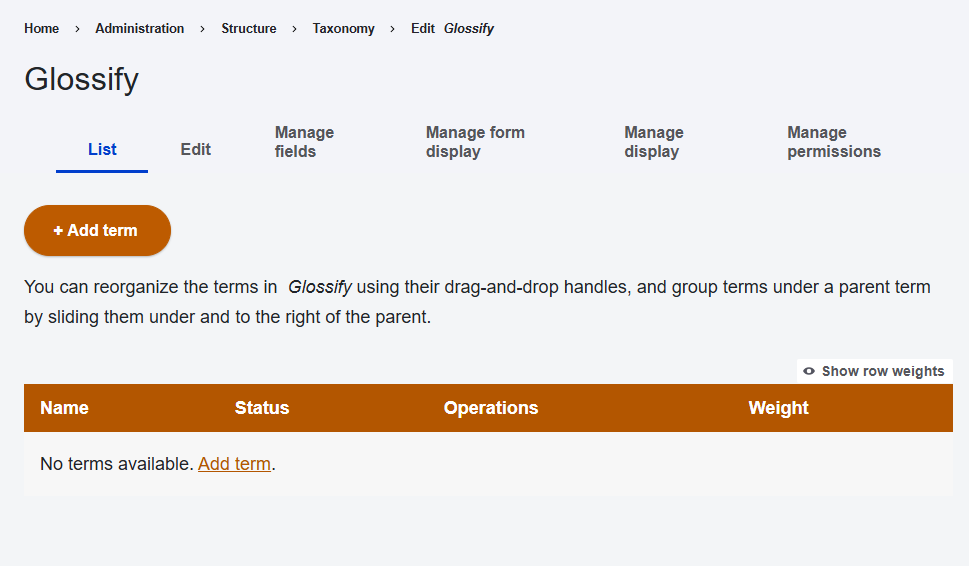
Go to the Glossify Vocabulary
Just as web managers can add terms to the Blog or Press Release vocabularies, you can add glossary terms to the Glossify vocabulary.
- Login and navigate to Structure > Taxonomy
- In the Vocabulary Name column, find Glossify.
- In the Operations column, select List Terms.
- The Glossify Vocabulary opens.
-
2
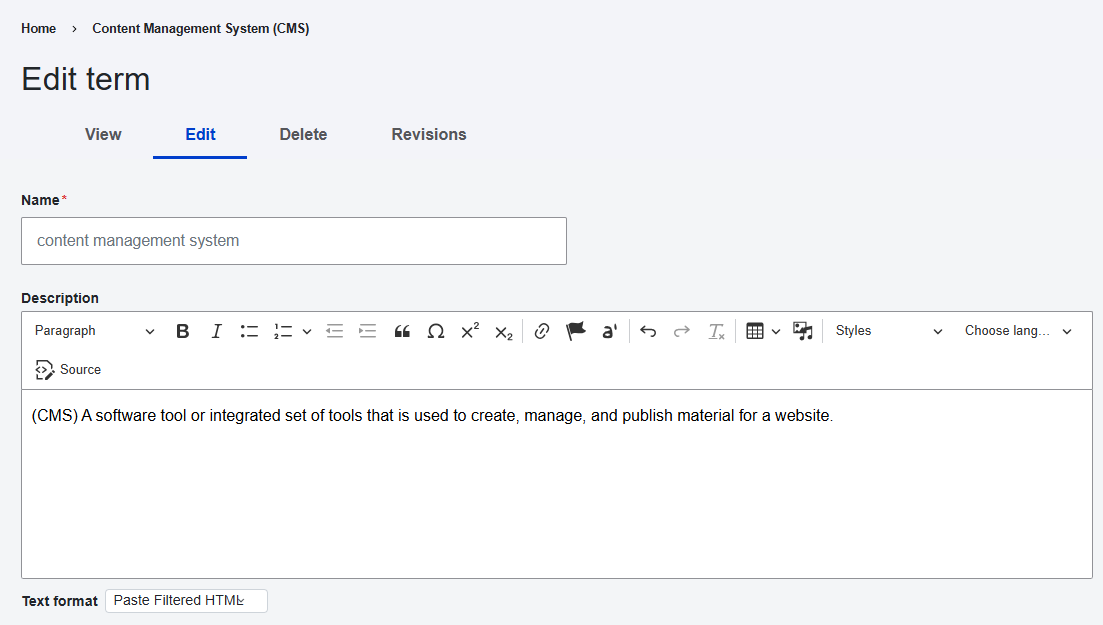
Add Term and Definition
All fields with an asterisk(*) are required.
- Select the Add term button. If terms have already been added to the glossary, they are provided in a table.
- Name (*) - Enter the term or acronym you want to define as it will appear on page text. This is case-sensitive, so you may wish to provide multiple variations of the same term if you want it defined in every context, i.e., at the beginning of a sentence or in the middle of one.
Example: "content management system" - Description - Enter the definition to be provided when the user selects the glossary term.
Example: "(CMS) A software tool or integrated set of tools that is used to create, manage, and publish material for a website." - Select Save to save the term and definition to the glossary.
-
3
Test the Glossary Item
- Navigate to a page that uses the term you just added to the vocabulary.
- The term now appears as a link within the Text component. A book icon indicates that the link opens a glossary term to distinguish it from other links. (Figure 1)
- Select the link for the term.
- A dialogue box opens displaying the term and its definition. (Figure 2)
- Select Close or the Exit button to close the dialogue box.
Interact with this Example: About Digital Commons
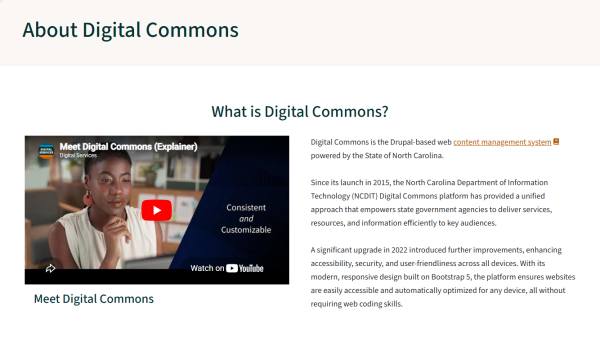
Figure 1: Glossary terms become links when appearing in the Text component. Enlarge 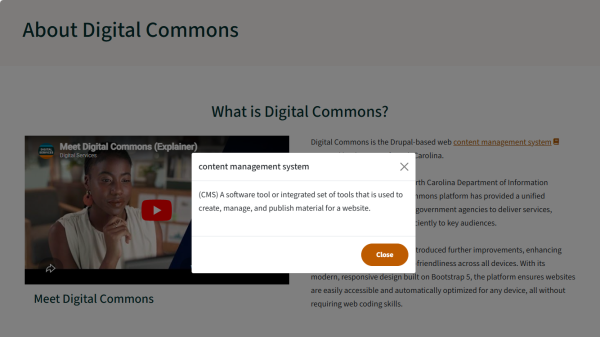
Figure 2: A dialogue box with the term and definition appear above the webpage. Enlarge AccordionTab/Accordion ItemsWhen testing, if your glossary item does not appear on a page that uses the term you just added to the vocabulary, check the following:
- Ensure that you have provided a definition for the vocabulary term in the Description field and saved the term.
- Ensure that the term you added matches the case of the term in context of the page. If you add "Content Management System" to the glossary using uppercase letters but use "content management system" on the page with lower case letters, the term will not be linked. You may need to create variations of your terms if it is reasonable to expect inconsistent casing.
- Check that the Text format drop-down menu is set to Paste Filtered HTML. The Full HTML option may override the glossary feature.
