
How to Create a Locator
-
1
Ask "What do visitors need to do?"
The Locator offers three different views. Each view offers a distinct display mode that changes how the user interacts with the Locator search. Choose the view that best matches your data, or edit your data so that it will work with the desired view. You can change the view mode at any time. Always consider your visitors' needs.
AccordionVisitors need to...
Choose the Map View
Map view lets a user search for the location closest to them. On larger screens, a map is shown. Use it for real places people travel to, like vaccine providers or clinics. Each location is shown at its street addresses. If a street address is not in the data, it will be placed using whatever location information is in the data (for instance, its ZIP code or city/town).
Your CSV Data Needs:
Street addresses
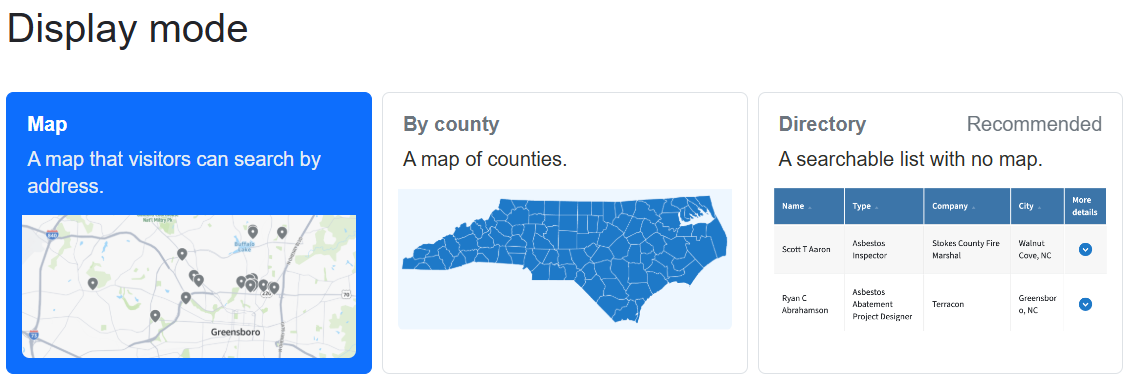
Choose the County View
County view (or By county) shows a map of North Carolina's 100 counties. A visitor can search by zip code, city, county or click the map. One location can serve several counties at once. The county view is similar to the NC Map component, but more advanced.
Your Data Needs:
A county column or street addresses.
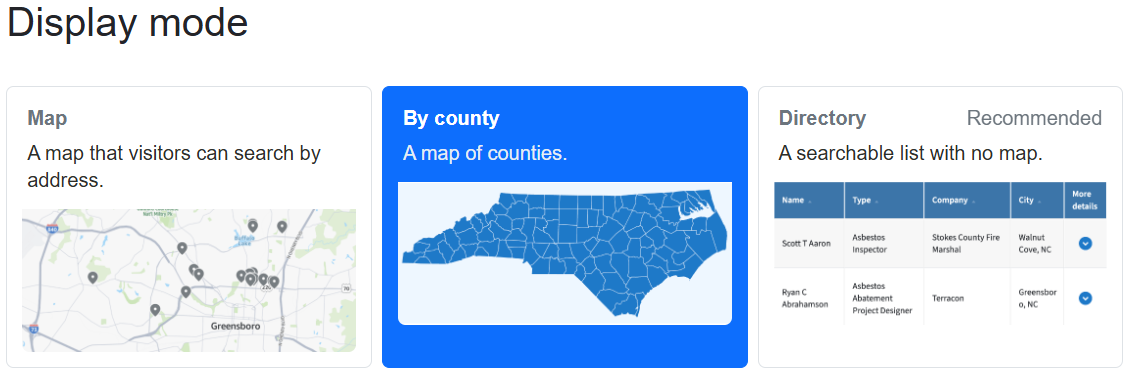
Choose the Directory View
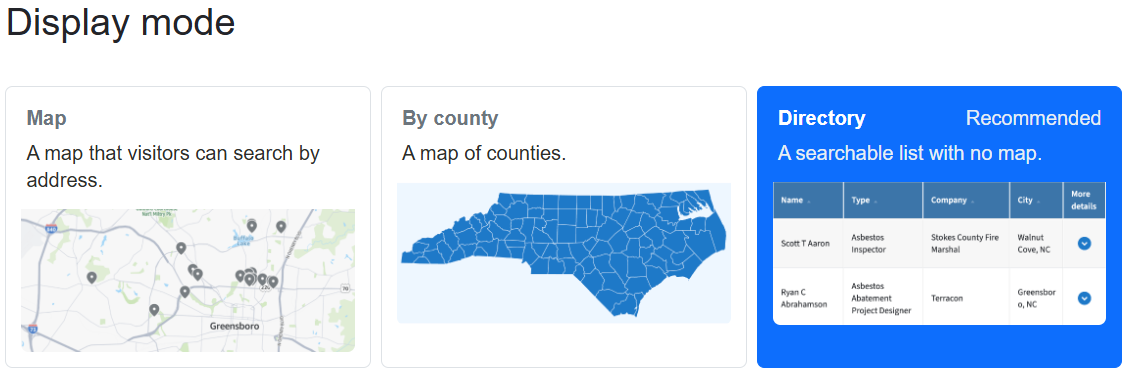
Directory view is a searchable, sortable table with no map. For example, a roster of accredited professionals. It needs only a name per row; addresses and other columns are shown and searched when you include them.
The directory view is similar to a Data Table, except it can be searched by ZIP code, city, town or county.
Your CSV Data Needs:
A name; location is optional.
-
2
Prepare your data for the desired user experience
There's no fixed template for your spreadsheet. You don't have to rename your columns. The tool reads your headings and figures out which is the address, the county, phone number, and so on. You'll confirm or correct its guesses.
For best results, follow these guidelines:
Don't include anything private- Visitors will be able to download the original spreadsheet, so remove things like personal cell numbers or internal notes before you upload.
Give every column a friendly heading- Headings (the first row of the spreadsheet) are shown to visitors as-is. If your spreadsheet has headings like "site_name" or "PHONE1", consider renaming them to something friendlier.
Avoid adding HTML or code- Unlike the traditional NC Map component, the system will automatically link websites, emails and phone numbers.
Try your spreadsheet in a test map- This is the fastest way to see what needs to change.
Accordion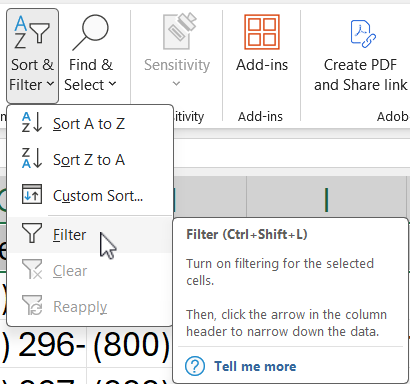
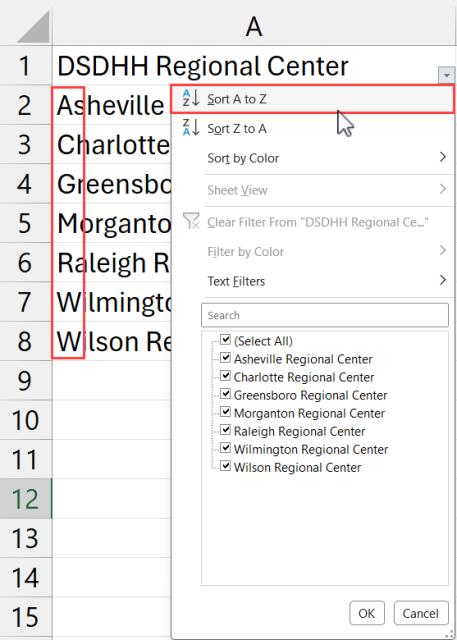
Use the Sort & Filter menu in Excel to turn on Filters for column headings. This makes it easier to update and maintain data. Filters allow you to:
Uncheck a category to temporarily hide that information so you can focus on what you do need to update.
Group like information together more easily.
Easily sort a column alphabetically by selecting A-Z.
-
3
Add Locator
- Add a new 1-Column Band to a Landing Page or Site Page.
- Inside the column, select the Add Component button.
- Select Locator from the Choose Component dialogue box.
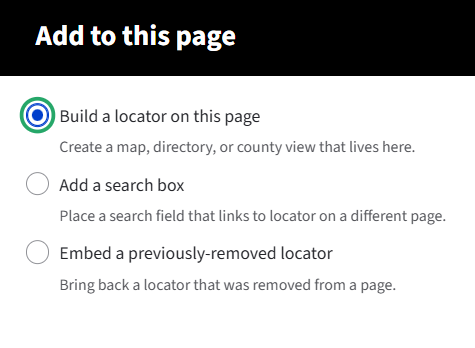
- Select Build a locator on this page from the Add to this page dialogue box.
-
4
Upload your CSV File
Locators can be added to Landing Pages and Site Pages. Create the page first, then add a locator.
Export your spreadsheet as a CSV (comma-separated value) file.
In Drupal, create or open a Landing Page or Site Page.
Add a component and choose "Locator," then "Build a locator on this page."
Begin the wizard that lets you upload the CSV file and configure the locator.
AccordionThese ready-made spreadsheets show each view in action. Download one, upload it, and experiment.
File View it suits Shows off nc-health-departments.csvCounty view One service per county nc-lme-mcos.csvCounty view One organization serving many counties vaccines-for-children.csvMap view Hundreds of pinned addresses + a filter crisis-services.csvMap view A facility-type filter accredited-asbestos-professionals.csvList view A searchable directory swift-team.csvCounty view (color) Color-coding by coverage
This page was last modified on 10/01/2026